Shadows
The Shadows section defines the base shading of the material. It controls how the material reflects light diffuse and how it is affected by other lighting. Options in the Light Data section heavily affect how the overall shading is performed.
This section configures the primary shading style to use on the material, as this section controls how stylized shadows are performed on the mesh.
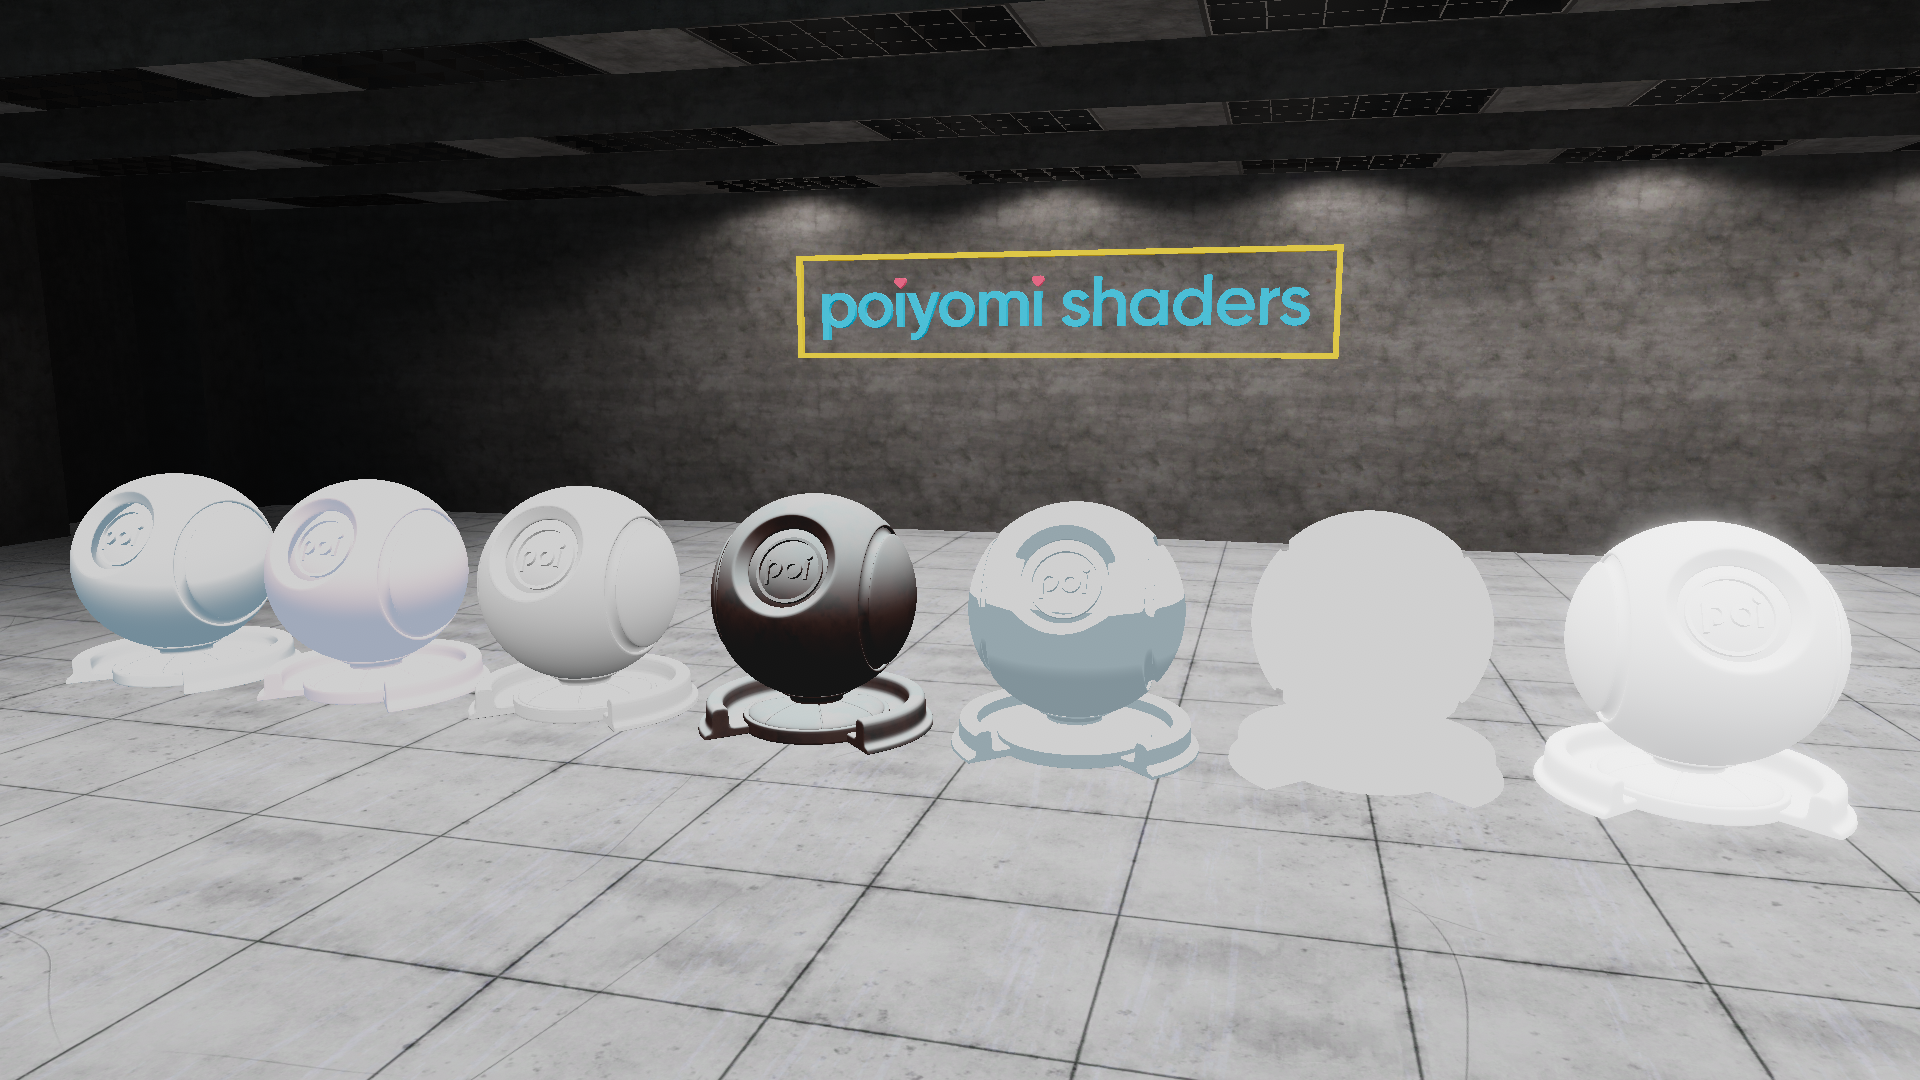
Various Shading Styles applied on these multiple Material Spheres.
This section often uses some terms interchangeably.
- Lighting and Shading are both talking about how the material is affected by light. Both control how Shadows appear on the mesh when lighting is occluded.
- Ramp and Gradient are both terms for a 1-dimensional function, using one input and producing one output.
Lighting Type
- Type
- Dropdown
- Options
- TextureRampMultilayer MathWrappedSkinShadeMapFlatdefaultRealisticClothSDF
Lighting mode to use. Each of these models uses the same lighting data in different ways to produce different lighting effects.
This option cannot be animated at runtime! Please consider a material swap if you need to change the lighting mode for some reason!
Texture Ramp
Texture Ramp is a Toon lighting method that uses a gradient texture to determine the lighting level. This texture can be edited using the Thry Gradient Editor by clicking the gradient texture slot.
Texture Ramp lighting is useful for creating cartoon-like lighting, especially when specific color gradients are desired.
Demonstration of Texture Ramp Shading using Thry Gradient Editor.
Texture Ramp Options
Shadow Tint
- Type
- Color
- Default
- #FFFFFF
Shadow Tint will tint the shadow map with a specific color, useful for creating a specific stylized shading effect. This color will be mixed with the Lighting Ramp and Ambient Color (if enabled) to produce the final shading.
Lighting Ramp
- Type
- Texture Slot
- Accepts
- Gradient texturesRGB On
Ramp texture that controls the overall shading in Texture Ramp. This is mapped from left-to-right, with the left-most pixel being the darkest and the right-most pixel being the lightest. This texture generally uses a black-to-white gradient, but it can contain colors to create a more specific lighting effect. However, we recommend to use grayscale for the best results.
This texture can be edited using the Thry Gradient Editor by clicking the wide gradient located to the right of the texture slot.
When editing the Ramp Texture using the Gradient Editor, your changes will be saved in the Assets/textures/Gradients folder in Unity with a unique identifier. If this folder doesn't exist, it will be generated automatically upon saving.
Ramp Offset
- Type
- Range
- Range
- -1to1
- Default
- 0
Offsets the ramp from left to right. Negative values will bias the lighting toward the left (darker) side, and positive values will bias the lighting toward the right (lighter) side.
Ramp Count
- Type
- Float
- Default
- 1
This will set an amount of Ramps to use on the Texture Ramp.
Ramp Selector UV
- Type
- Dropdown
- Options
- UV0UV1UV2UV3
Type: Dropdown, Options:UV0/UV1/UV2/UV3
Chooses which UV to use for the Ramp.
Shadow Strength
- Type
- Range
- Range
- 0to1
- Default
- 1
Determines how strong of a shadow is applied. A value of 0.0 will not apply any shadow, and a value of 1.0 will apply a full shadow.
Ignore Indirect Shadow Color
- Type
- Range
- Range
- 0to1
- Default
- 1
Determines whether or not to incorporate the full ambient color into the lighting calculation. A value of 0.0 will fully tint the shadow with the ambient color, and a value of 1.0 will ignore it.
Multilayer Math
Multilayer Math is a Toon Lighting method that uses mathematically defined gradients to determine the lighting level. These gradients can be edited using the defined settings, and set using colors or textures. Multilayer Math shares the same behavior as Lil Toon's primary shading feature, known as Shadows.
Multilayer Math shading is useful for creating robust toon shading that performs well in most lighting conditions. On a basic level, Multilayer Math has three shadow layers, and a border. Not all layers need to be used, nor the border... as the visibility of those shadow layers are controlled by the Shadow Layer's Color Alpha.
In very old versions of Poiyomi Shaders, the Math Gradient shading mode was used to create a similar effect, but this mode was replaced in favor of the more flexible Multilayer Math system from Lil Toon you see here.
Demonstration of Multilayer Math Shading with the Shadow Layers.
Multilayer Math Options
Shadow Layers
Shadow Layer 1 Options
Color Tex
- Type
- Texture Slot
- Accepts
- Color texturesRGB On
The Shadow Color texture, if defined, sets the base color of the shadow in different parts of the model. Will be tinted by the Shadow color.
Color
- Type
- Color
- Default
- #D1C2D9
Defines the basic shadow color for the Multilayer Math shading model. This color must have a non-zero alpha value to take effect.
Border
- Type
- Range
- Range
- 0to1
- Default
- 0.5
Defines the position on the lightmap of the border between the shadow color and light. In other words, this sets where the edge of the shadow is.
Blur
- Type
- Range
- Range
- 0to1
- Default
- 0.1
Defines how much to blur the shadow out from the border position. A value of 0.0 will not blur the shadow, and a value of 1.0 will blur the shadow to the edge of the lightmap.
Receive Shadow
- Type
- Range
- Range
- 0to1
- Default
- 0
How much this shadow layer should receive shadows.
Normal Blend
- Type
- Range
- Range
- 0to1
- Default
- 1
Sets how much to blend this Shadow Layer with the Normals.
Shadow Layer 2 Options
Color Tex
- Type
- Texture Slot
- Accepts
- Color texturesRGB On
The Shadow Color texture, if defined, sets the base color of the shadow in different parts of the model. Will be tinted by the Shadow color.
Color
- Type
- Color
- Default
- #ADA8C9
Defines the basic shadow color for the Multilayer Math shading model. This color must have a non-zero alpha value to take effect.
Border
- Type
- Range
- Range
- 0to1
- Default
- 0.15
Defines the position on the lightmap of the border between the shadow color and light. In other words, this sets where the edge of the shadow is.
Blur
- Type
- Range
- Range
- 0to1
- Default
- 0.1
Defines how much to blur the shadow out from the border position. A value of 0.0 will not blur the shadow, and a value of 1.0 will blur the shadow to the edge of the lightmap.
Receive Shadow
- Type
- Range
- Range
- 0to1
- Default
- 0
How much this shadow layer should receive shadows.
Normal Blend
- Type
- Range
- Range
- 0to1
- Default
- 1
Sets how much to blend this Shadow Layer with the Normals.
Shadow Layer 3 Options
Color Tex
- Type
- Texture Slot
- Accepts
- Color texturesRGB On
The Shadow Color texture, if defined, sets the base color of the shadow in different parts of the model. Will be tinted by the Shadow color.
Color
- Type
- Color
- Default
- #000000
Defines the basic shadow color for the Multilayer Math shading model. This color must have a non-zero alpha value to take effect.
Border
- Type
- Range
- Range
- 0to1
- Default
- 0.25
Defines the position on the lightmap of the border between the shadow color and light. In other words, this sets where the edge of the shadow is.
Blur
- Type
- Range
- Range
- 0to1
- Default
- 0.1
Defines how much to blur the shadow out from the border position. A value of 0.0 will not blur the shadow, and a value of 1.0 will blur the shadow to the edge of the lightmap.
Receive Shadow
- Type
- Range
- Range
- 0to1
- Default
- 0
How much this shadow layer should receive shadows.
Normal Blend
- Type
- Range
- Range
- 0to1
- Default
- 1
Sets how much to blend this Shadow Layer with the Normals.
Border
Border Options
Border Color
- Type
- Color
- Default
- #FF1900
The Border Color defines the color of a border, which is an extra color applied to the edge of the main shadow. This color must have a non-zero alpha value to take effect.
Border Range
- Type
- Range
- Range
- 0to1
- Default
- 0.08
How far off of the border the border color is applied. A value of 0.0 will apply the border color to the edge of the shadow, and a value of 1.0 will apply the border color to the dark edge of the lightmap.
Shadow Map
Shadow Map Options
Map Type
- Type
- Dropdown
- Options
- StrengthFlat
Choice of what Shadow Map type should be used. Strength will go by the strength values determined by the map, while Flat will enable customized sliders to determine the appearance.
Color Tex
- Type
- Texture Slot
- Accepts
- Color texturesRGB On
Texture Slot that determines the Shadow Map.
Border
- Type
- Range
- Range
- -2to2
- Default
- 1
- Shown when
Map Type is set to
Flat
Border intensity of the shadow map.
Blur
- Type
- Range
- Range
- 0.001to2
- Default
- 1
- Shown when
Map Type is set to
Flat
How much to blur the border of the shadow map.
Shadow Border Map
- Type
- Toggle
Enables the Shadow Border Map feature, allowing control over AO-style Shadow boundaries on Multilayer Math. Defines the AO (Ambient Occlusion) texture to use in Multilayer Math. Amount of Level of Detail to use for the Border Map. If enabled, ignores the properties set in Border. Minimum amount from the Shadow Border to apply to Layer 1. Maximum amount from the Shadow Border to apply to Layer 1. Minimum amount from the Shadow Border to apply to Layer 2. Maximum amount from the Shadow Border to apply to Layer 2. Minimum amount from the Shadow Border to apply to Layer 3. Maximum amount from the Shadow Border to apply to Layer 3.Shadow Border Map Options
AO Map
Border Map LOD
Ignore Border Properties
1st Min
1st Max
2nd Min
2nd Max
3rd Min
3rd Max
Blur Map
- Type
- Texture Slot
- Accepts
- Data texturesRGB Off
Texture Slot to define the Blur Map of Multilayer Math.
Non Linear Lightmap
- Type
- Toggle
If enabled, changes the shadow gradient direction to be non-linear.
Base Color Blend
- Type
- Range
- Range
- 0to1
- Default
- 0
How much to blend the shadow gradients to the Base Color.
Env Strength on Shadow Color
- Type
- Range
- Range
- 0to1
- Default
- 0
Determines how strong the environmental influences the shadow color.
Shadow Strength
- Type
- Range
- Range
- 0to1
- Default
- 1
Determines how strong of a shadow is applied. A value of 0.0 will not apply any shadow, and a value of 1.0 will apply a full shadow.
Ignore Indirect Shadow Color
- Type
- Range
- Range
- 0to1
- Default
- 1
Determines whether or not to incorporate the full ambient color into the lighting calculation. A value of 0.0 will fully tint the shadow with the ambient color, and a value of 1.0 will ignore it.
Wrapped
Wrapped lighting is a semi-realistic lighting method that uses a mathematical gradient to determine the lighting level, like Multilayer Math. However, it wraps the gradient around the edges of the material. This creates a softer, more realistic lighting effect. Wrapped lighting is useful for creating flexible, realistic lighting that performs well in most lighting conditions.
For technical details of this method, see Jordan Stevens' Lighting Models In Unity (Half-Lambert (Diffuse Wrap) section), Stephen Hill's Righting Wrap, or Steve McAuley's Energy-Conserving Wrapped Diffuse.
Demonstration of Wrapped Shading and the various adjustments.
Wrapped Options
Shadow Tint
- Type
- Color
- Default
- #FFFFFF
Shadow Tint will tint the shadow map with a specific color, useful for creating a specific stylized shading effect. This color will be mixed with the Ambient Color (if enabled) to produce the final shading.
LightSide Color
- Type
- Color
- Default
- #FFFFFF
LightSide Color will tint the color of the side in Lighting.
Wrap
- Type
- Range
- Range
- 0to2
- Default
- 0
Determines how much to wrap the gradient around the edges of the model. A value of 0.0 will not wrap the gradient at all, producing a realistic, more aggressive shadow edge. Increase this value to wrap the gradient more significantly, producing a softer, more stylized shadow edge. At a value of 2.0 the gradient will produce an almost flat lit effect.
Normalization
- Type
- Range
- Range
- 0to1
- Default
- 0
Normalization is a value that determines how much to darken the wrapped gradient. This is usually kept at 0.5, but can be adjusted (especially on the fly) to dynamically adjust the model's light level.
How much this value applies depends on the Wrap value. At a Wrap of 0.0, Normalization will have no effect at all. At increasing Wrap values, Normalization will have an increasingly important effect.
Gradient Start
- Type
- Range
- Range
- 0to1
- Default
- 0
Gradient Start controls the start point of the lightmap gradient that the wrap is applied to. Generally, this value is kept between 0.0 - 0.2, with higher values resulting in more bright areas on the model.
Gradient End
- Type
- Range
- Range
- 0to1
- Default
- 0.5
Gradient End controls the end point of the lightmap gradient that the wrap is applied to. Generally, this value is kept between 0.5 - 1.0, with higher values resulting in less dark areas on the model. A wider range between the Gradient Start and Gradient End will result in a softer gradient, while a narrower range will result in a sharper gradient.
Shadow Strength
- Type
- Range
- Range
- 0to1
- Default
- 1
Determines how strong of a shadow is applied. A value of 0.0 will not apply any shadow, and a value of 1.0 will apply a full shadow.
Ignore Indirect Shadow Color
- Type
- Range
- Range
- 0to1
- Default
- 1
Determines whether or not to incorporate the full ambient color into the lighting calculation. A value of 0.0 will fully tint the shadow with the ambient color, and a value of 1.0 will ignore it.
Skin
Skin lighting is a semi-realistic lighting method that uses a Lookup table (LUT) to determine the lighting level. An example LUT (SkinLUT.png) is included in the shader package. The details of this method are more technical, but using skin lighting is simple.
Skin lighting is useful for achieving a realistic human skin lighting effect.
This lighting mode is experimental and is not fully implemented yet, as it requires more data (thickness maps) to work fully. This will be improved in the future.
Demonstration of Skin Shading and how a Thickness Map is used with it.
Skin Options
Shadow Tint
- Type
- Color
- Default
- #FFFFFF
Shadow Tint will tint the shadow with a specific color, useful for creating a specific stylized shading effect. This color will be mixed with the Ambient Color (if enabled) to produce the final shading.
LUT
- Type
- Texture Slot
- Accepts
- Color texturesRGB On
- Default
- SkinLUT.png
The LUT is used to determine the lighting ramp at various scales. This texture consists of a series of RGB values, with the horizontal axis representing the light level, and the vertical axis representing the thickness of the skin.
Scale
- Type
- Range
- Range
- 0to1
- Default
- 1
Scales the Subsurface Scattering (SSS) effect. A value of 0.0 will disable the SSS effect, and a value of 1.0 will apply the SSS effect at full strength.
Thickness Map
- Type
- Texture Slot
- Accepts
- Data texturesRGB Off
Specifies a texture map to use for the skin thickness.
Thickness Power
- Type
- Range
- Range
- 0to3
- Default
- 1
Modifies the amount of influence the Thickness Map has on the LUT.
Bump Blur
- Type
- Range
- Range
- 0to1
- Default
- 0.7
Sets how much to blur the Bumps from the Thickness Map.
Shadow Strength
- Type
- Range
- Range
- 0to1
- Default
- 1
Determines how strong of a shadow is applied. A value of 0.0 will not apply any shadow, and a value of 1.0 will apply a full shadow.
Ignore Indirect Shadow Color
- Type
- Range
- Range
- 0to1
- Default
- 1
Determines whether or not to incorporate the full ambient color into the lighting calculation. A value of 0.0 will fully tint the shadow with the ambient color, and a value of 1.0 will ignore it.
ShadeMap
ShadeMap lighting uses textures to determine the lighting level. Options are available for using specific ShadeMap images, or to use the base color map as the ShadeMap, with a specific ShadeColor tint added.
ShadeMap lighting is useful for creating highly stylized lighting effects. It's similar to UnityChan Toon Shader 2's three-color shading system.
For a basic ShadeMap shading setup, you can enable Use BaseMap as 1st ShadeMap and Use BaseMap as 2nd ShadeMap, set the 1st ShadeColor and 2nd ShadeColor to a lighter and darker tone respectively, and set the BaseColor Step and ShadeColor Step to a larger (0.4 - 0.6) and smaller (0.1 - 0.3), respectively.
Demonstration of ShadeMap and it's properties.
ShadeMap Options
1st ShadeColor
- Type
- Color
- Default
- #FFFFFF
Primary tint applied to the 1st ShadeMap. If ShadeMap texture is defined, this color will be mixed with the ShadeMap texture. If not, it should generally be set lighter than the 2nd ShadeColor.
1st ShadeMap
- Type
- Texture Slot
- Accepts
- Color texturesRGB On
Shading map used for the 1st ShadeColor. If this is not defined, the 1st ShadeColor alone will be used. Shading maps define what the shadow should look like in this area.
Use BaseMap as 1st ShadeMap
- Type
- Toggle
Whether to use the BaseColor map as the 1st ShadeMap. With no 1st ShadeMap defined, this should generally be enabled.
2nd ShadeColor
- Type
- Color
- Default
- #FFFFFF
Primary tint applied to the 1st ShadeMap. If ShadeMap texture is defined, this color will be mixed with the ShadeMap texture. If not, it should generally be set lighter than the 2nd ShadeColor.
2nd ShadeMap
- Type
- Texture Slot
- Accepts
- Color texturesRGB On
Shading map used for the 1st ShadeColor. If this is not defined, the 1st ShadeColor alone will be used.
Use BaseMap as 2nd ShadeMap
- Type
- Toggle
Whether to use the BaseColor map as the 2nd ShadeMap. With no 2nd ShadeMap defined, this should generally be enabled.
BaseColor_Step
- Type
- Range
- Range
- 0.01to1
- Default
- 0.5
Defines where the edge should lie between the base lit color and the 1st shadow. A value of 0.0 will result in a completely lit area, and a value of 1.0 will result in a completely shadowed area.
Base/Shade_Feather
- Type
- Range
- Range
- 0.0001to1
- Default
- 0.0001
How much to feather the edge of the base color and shading. A value of 0.0 will result in a sharp edge, and a value of 1.0 will result in a very smooth edge.
ShadeColor_Step
- Type
- Range
- Range
- 0to1
- Default
- 0
Defines where the edge should lie between the 1st shadow and the 2nd shadow. A value of 0.0 will result in no 2nd shadow, and a value of 1.0 will make the 2nd shadow dominate the overall shadow. This value is dependent on the BaseColor_Step value.
1st/2nd_Shades_Feather
- Type
- Range
- Range
- 0.0001to1
- Default
- 0.0001
How much to feather the edge of the 1st shadow and the 2nd shadow. A value of 0.0 will result in a sharp edge, and a value of 1.0 will result in a very smooth edge.
Blend Mode
- Type
- Dropdown
- Options
- ReplaceMultiply
Defines how the shadow should blend with the base color. Replace will replace the base color with the shadow, creating a more straightforward effect. Multiply will multiply the base color with the shadow, creating a more stylized effect.
Shadow Strength
- Type
- Range
- Range
- 0to1
- Default
- 1
How much to apply the shadow. A value of 0.0 will not apply any shadow, and a value of 1.0 will apply the shadow fully.
Flat
Flat Lighting is a toon lighting mode that uniformly lights the model at the same level. The direct and indirect lighting data is used to calculate an average across the entire model. It does not incorporate the model normals, or any normal maps, to determine lighting.
Flat Light is useful for creating models that are highly robust to local lighting, but sacrifices detail.
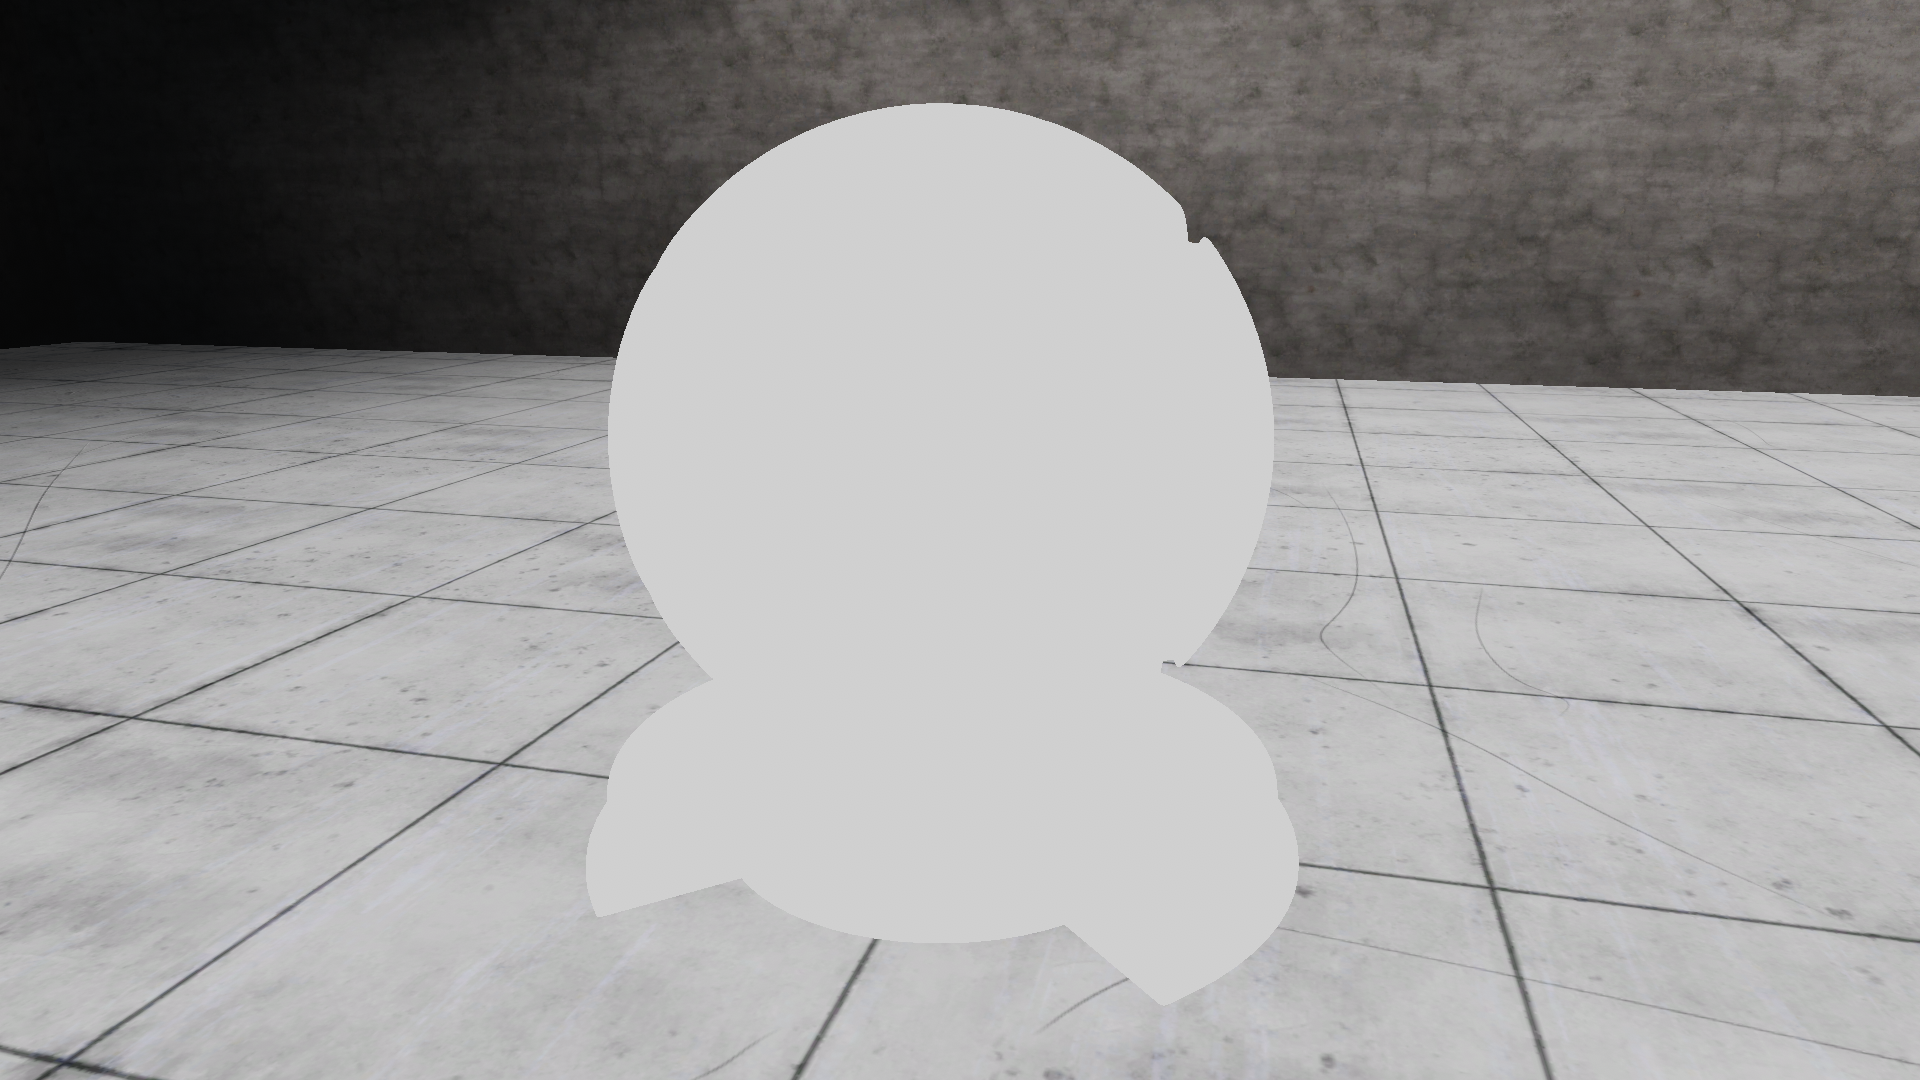
Flat Shading. Completely life-less.
Force Ramped Lightmap
- Type
- Toggle
Forces a ramped lightmap to be used with Flat shading.
Realistic
Realistic lighting is a physically-based lighting model that behaves similar to the lighting found in the Unity Standard shader. It's useful for creating models that are realistic and perform well in many lighting conditions.
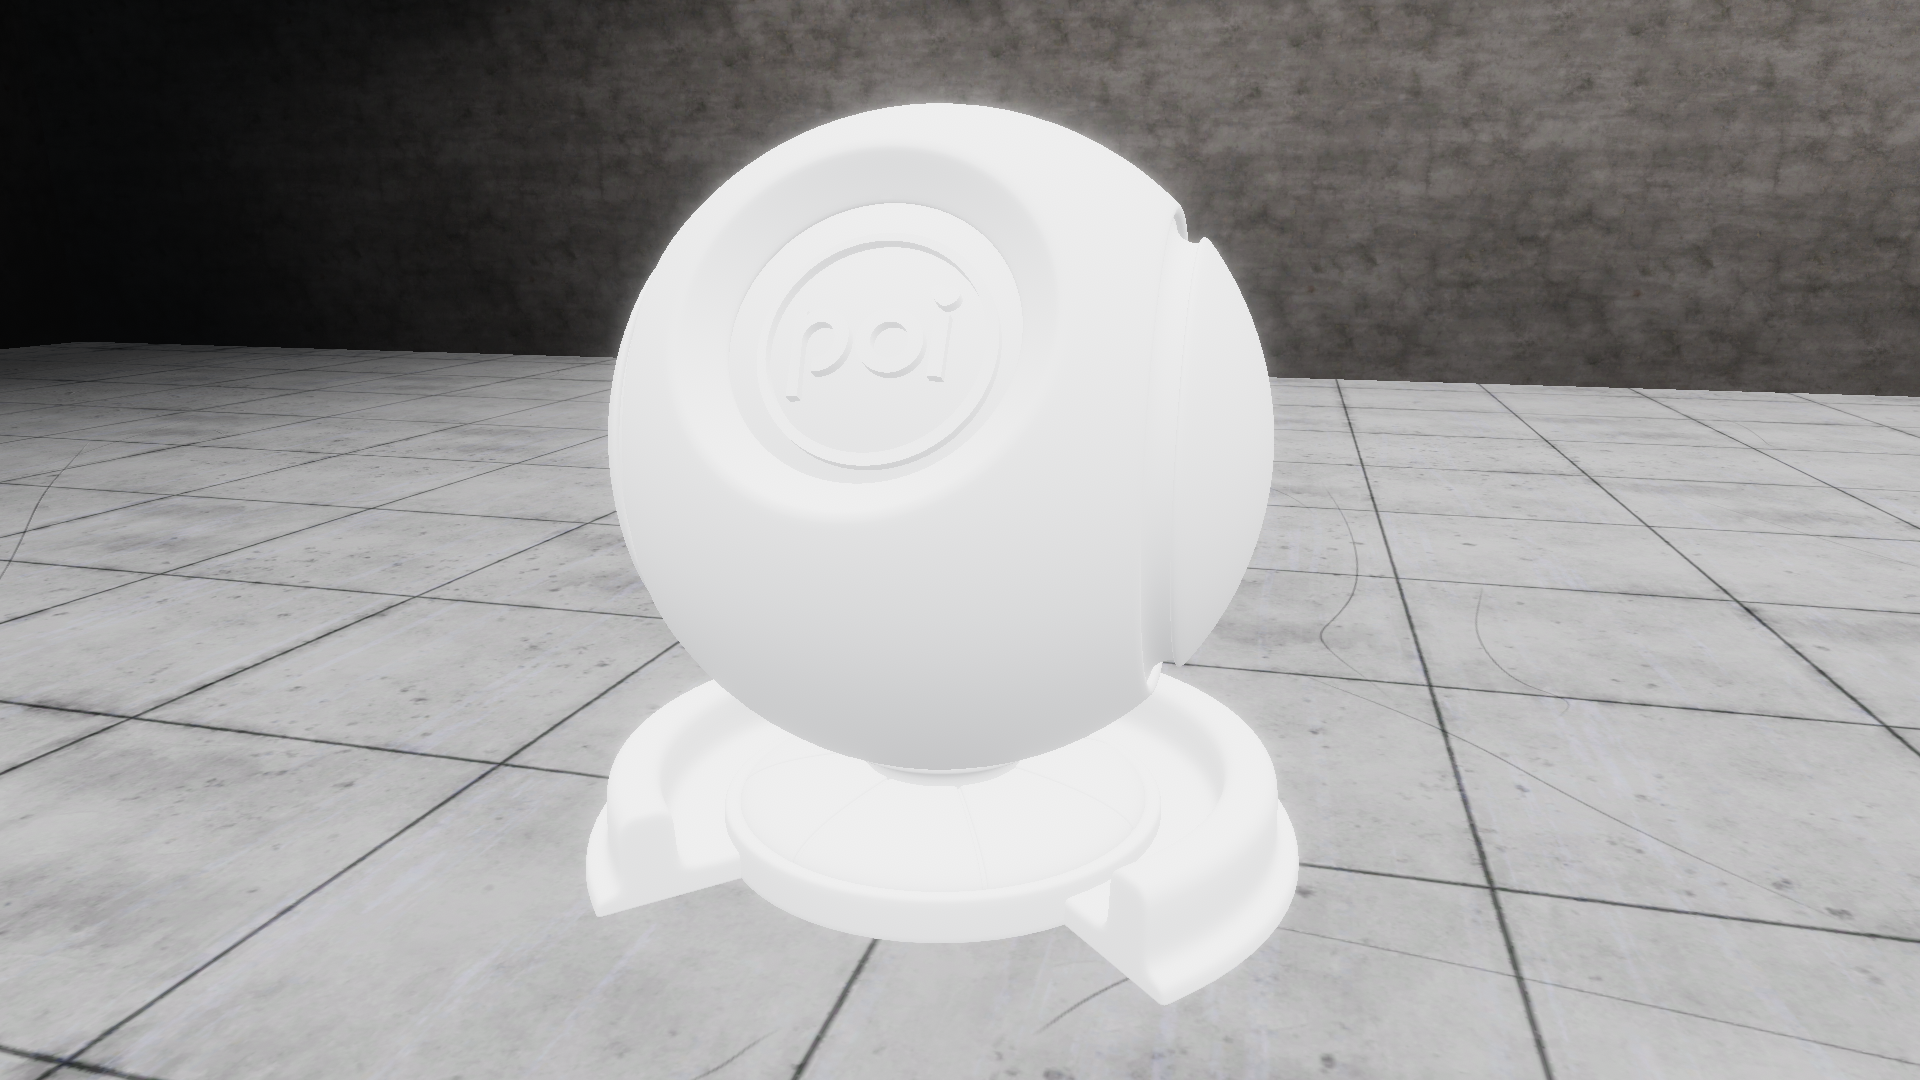
Realistic Shading.
Realistic Options
Shadow Tint
- Type
- Color
- Default
- #FFFFFF
Shadow Tint will tint the shadow map with a specific color, useful for creating a specific stylized shading effect. This color will be mixed with the Ambient Color (if enabled) to produce the final shading.
Shadow Strength
- Type
- Range
- Range
- 0to1
- Default
- 1
Determines how strong of a shadow is applied. A value of 0.0 will not apply any shadow, and a value of 1.0 will apply a full shadow.
Cloth
Cloth shading is a physically-based lighting model that draws from the Cloth shading model used in Google's Filament engine. It uses a packed mask to determine physically-based components of the lighting.
Cloth shading has Reflections & Specular already built-in. Therefore, it's not necessary to use both Cloth shading and Reflections & Specular at the same time!
Cloth Options
Shadow Tint
- Type
- Color
- Default
- #FFFFFF
Shadow Tint will tint the shadow map with a specific color, useful for creating a specific stylized shading effect. This color will be mixed with the Ambient Color (if enabled) to produce the final shading.
MultScatter Cloth DFG
- Type
- Texture Slot
- Accepts
- Color texturesRGB On
- Default
- dfg-multiscatter-cloth.exr
This is a built-in data texture that contains a pre-baked lookup table for the cloth model. It cannot be modified.
Maps
- Type
- Texture Slot
- Accepts
- Data texturesRGB Off
The map texture defines multiple settings of the Cloth lighting across different parts of the material. These maps are packed into a single texture, which increases performance and reduces memory usage.
This texture can be exported from programs like Adobe Substance Painter as a pre-packed map, or packed using the inline packing tool included with the Poiyomi Shaders package.
Metallic Map
The metallic map defines where the material should be metallic, and where it should be non-metallic (dielectric). This should generally be black or white, with few situations requiring in-between values.
Cloth Mask
The cloth mask defines where there should be standard specular and diffuse lighting, and where the cloth model should be rendered. This should generally be black or white, with white representing the cloth model, and black representing the standard specular and diffuse lighting.
Reflectance
The reflectance mask defines the reflectivity of the model. Reflectivity is a physically-based-shading parameter that determines how much reflection a non-metallic surface will have. This can often be left white, but can be used to create a more realistic look.
Smoothness
The Smoothness map defines where the material should be smoother, and where it should be rougher. This value can vary smoothly between 0.0 and 1.0 according to variations and different parts of a material.
Clothmask Lerp
- Type
- Toggle
Clothmask Lerp defines whether the cloth mask should lerp (linearally interpolate) between the cloth shading and realistic shading. This should generally be left off.
Metallic
- Type
- Range
- Range
- 0to1
How metallic the material should be. Metallic materials are usually used for (as would be expected) metals. The defining feature of metallic surfaces is that reflections are tinted with the color of the material. For non-metallic materials, the reflections are not tinted.
This value is multiplied with the value of the Metallic Map. If no metallic map is defined, this setting is used directly.
Reflectance
- Type
- Range
- Range
- 0.35to1
Reflectivity is a physically-based-shading parameter that determines how much reflection a non-metallic surface will have. This heavily influences the look of the cloth shading, and will vary heavily according to different types of cloth.
Smoothness
- Type
- Range
- Range
- 0to1
How smooth the material should be. Smoothness is a value that controls how diffuse, or blurred, highlights and reflections are. A value of 0.0 means that the material is completely diffuse, meaning reflections will be highly blurred, and specular reflections will be large and not very bright. A value of 1.0 means that the material is completely smooth, and will have very small and concentrated specular.
Smoothness is the opposite of Roughness, and they can be converted by inverting the value - 0.2 roughness is 1.0 - 0.2 = 0.8 smoothness, and 0.7 smoothness would be 1.0 - 0.7 = 0.3 roughness.
This value is multiplied with the value of the Smoothness Map. If no smoothness map is defined, this setting is used directly.
SDF
SDF (Signed Distance Field) is a complex shading style that defines how shadows should act based on the direction of light. This can create cell-looking shadows in a way similar to how Mihoyoverse renders their models (Genshin Impact, Zenless Zone Zero, etc.)
In a similar fashion to having a Shadow Map, SDF requires a specialized data texture, specific to your model, in order for the appearance of SDF to appear as intended.
Therefore, the results will appear "flat" if there is no texture defined.
SDF Options
Shadow Tint
- Type
- Color
- Default
- #FFFFFF
Shadow Tint will tint the shadow with a specific color, useful for creating a specific stylized shading effect. This color will be mixed with the Ambient Color (if enabled) to produce the final shading.
SDF
- Type
- Texture Slot
- Accepts
- Data texturesRGB Off
Defines the Signed Distance Field to use for the shading.
Blur
- Type
- Range
- Range
- 0to1
- Default
- 0.1
Defines how much to blur the shadow out from the SDF's borders. A value of 0.0 will not blur the shadow, and a value of 1.0 will blur the shadow to the edge of the lightmap.
Forward Direction
- Type
- Float3
- Default
- X0Y0Z1
Defines the direction of the shading in the forward direction, in X Y and Z coordinates.
Left Direction
- Type
- Float3
- Default
- X-1Y0Z0
Defines the direction of the shading in the leftward direction, in X Y and Z coordinates.
Shadow Strength
- Type
- Range
- Range
- 0to1
- Default
- 1
Determines how strong of a shadow is applied. A value of 0.0 will not apply any shadow, and a value of 1.0 will apply a full shadow.
Ignore Indirect Shadow Color
- Type
- Range
- Range
- 0to1
- Default
- 1
Determines whether or not to incorporate the full ambient color into the lighting calculation. A value of 0.0 will fully tint the shadow with the ambient color, and a value of 1.0 will ignore it.
Add Pass (Point & Spot Lights)
These options affect how shading is performed in the Add pass. This pass is used for realtime lights like Point, Spot, and Directional lights.
Lighting Type (Add Pass)
- Type
- Dropdown
- Options
- ToonRealisticSame as Base Passdefault
Which lighting model to use for the Add pass.
Toon
Toon add pass lighting behaves somewhat like the Multilayer Math lighting mode. It uses gradient settings to determine the start and end points of the added lighting. This is the most common Add Pass to use for Toon-based shading.
Toon Options (Add Pass)
Realistic
Realistic add pass lighting uses a physically-based lighting model to determine the added lighting. It is appropriate for most non-heavily-styled models.
Same as Base Pass
Makes the Add Pass Lighting match close to your Lighting Type (Base Pass) settings. Be aware that the results of using this option will vary.
Global Masks
LightMap to Global Mask
- Type
- Dropdown
- Options
- Off1R1G1B1A2R2G2B2A3R3G3B3A4R4G4B4A
If set, will send the Lighting data to a Global Mask of your choice as a mask. This will make the data written to the Global Mask appear based on it's illumination from the environment.
Inversed LightMap to Global Mask
- Type
- Dropdown
- Options
- Off1R1G1B1A2R2G2B2A3R3G3B3A4R4G4B4A
If set, will send inverted Lighting data to a Global Mask of your choice as a mask. This is similar to the above option, but it will invert the data instead.