Matcap
Matcaps, or "Sphere Textures," are textures that are mapped to an object based on the relative angle of the view direction and the material's normal direction. This means that areas that are pointing up will be mapped to the top center of the matcap texture, areas pointing down and right will be mapped to the bottom right of the texture, and so on.
The word Matcap is a portmanteau of Material Capture. The technique was originally designed as a fast, low-overhead way to approximate the look of specific materials, baking in many details. With modern GPU performance and physically based shading techniques, matcaps are not as necessary for performance as they used to be.
There are a total of 4 Matcap sections (0, 1, 2, 3) available to you, each being independent of each other.
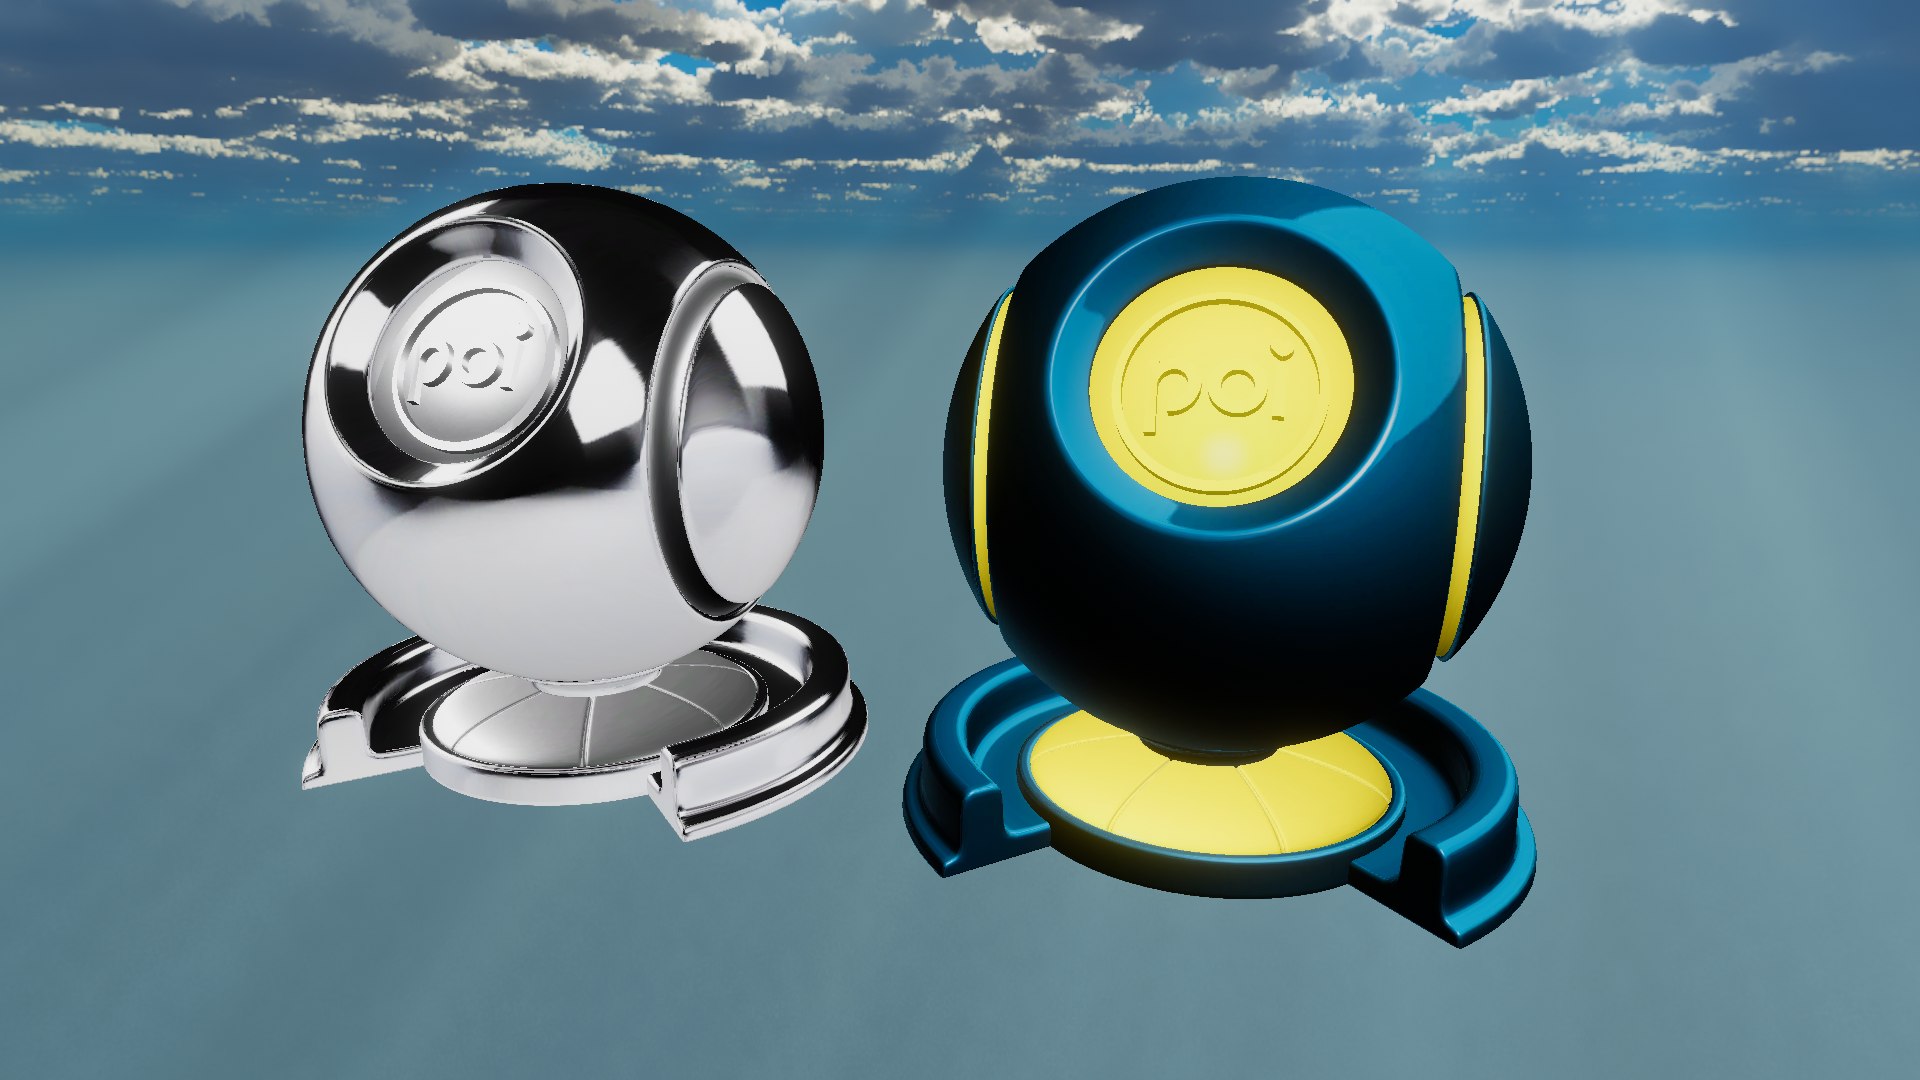
Example of various Matcaps used on two Material Spheres.
UV Mode
- Type
- Dropdown
- Options
- UTS StyleTop PinchdefaultDouble SidedGradient
Defines how to apply the UV to the normals of the model.
UTS Style
UTS Style maps the texture based on the view normals, with no correction for the angle of view. This results in slightly more distortion in the top and bottom of the texture, but is generally acceptable. In VR, however, moving your head results in a rotation and distortion of the matcap.
Top Pinch
Top Pinch maps the texture based on the view normals, with a correction for the angle of view. This prevents rotation of the matcap when the head is tilted in VR. This results in a more uniform projection, but has artifacts in the top and bottom of the texture.
Double Sided
Double Sided uses the object's orientation and the reflection vectors to determine the matcap projection. This results in a consistent, unique matcap effect. However, this may require an arbitrary adjustment of the matcap's Border value for it's appearance to look good.
Gradient
Allows you to configure a radial gradient to be used as your matcap texture. Click the rectangle to the right of the Matcap texture slot to open the gradient editor.
Gradient replicates the effect used in the old Iridescence feature in older versions of Poiyomi Shaders.
Color
- Type
- Color
Tint color applied to the matcap texture. This color is multiplied with the matcap texture.
Matcap
- Type
- Texture Slot
- Accepts
- Color texturesRGB On
Texture used for the matcap. This can be any color texture, but is typically a sphere texture.
Matcap Slot Options
Blend UV X
- Type
- Range
- Range
- 0to1
How much to blend on the UV's X-axis.
Blend UV Y
- Type
- Range
- Range
- 0to1
How much to blend on the UV's Y-axis.
Set this value to 1.0, leaving the X Blend above to 0.0 to emulate the "AngelRing" effect.
UV To Blend
- Type
- Dropdown
- Options
- UV0UV1UV2UV3PanosphereWorld PosLocal PosPolar UVDistorted UVMatcapScreen Space
Choice of UV space to blend the Matcap with.
Border
- Type
- Range
- Range
- 0to5
- Default
- 0.5
How far toward the edge the Matcap texture should be applied. At 0.0, it would only project the very center. At 0.5, it would project all the way to the edge.
The Border value should be chosen based on how your Matcap texture appears. This is because there can be arbitrary cases depending on the UV Mode you choose. By default, 0.5 should be what you use as it shows the whole Matcap as-is.
If using Double Sided for your Matcap, it's recommended to set this to an arbitrary value of 0.43 for the intended appearance.
Rotation
- Type
- Range
- Range
- -1to1
How much to rotate the Matcap texture.
VR Parallax Strength
- Type
- Range
- Range
- 0to1
Sets a parallax strength shown in VR for the Matcap.
Intensity
- Type
- Range
- Range
- 0to5
A scaling factor for the matcap texture. This is useful for making the matcap texture more or less visible, and defaults to 1.0. Values above 1.0 will make the matcap brighter.
Emission Strength
- Type
- Range
- Range
- 0to20
How much emission to apply to the matcap.
Base Color Mix
- Type
- Range
- Range
- 0to1
How much to blend with the Base Color or Main Texture.
Light Color Mix
- Type
- Range
- Range
- 0to1
How much to blend with the Light color.
Normal Strength
- Type
- Range
- Range
- 0to1
How much to blend with the Normals of your Material.
Reflection Fallback
- Type
- Toggle
If enabled, will treat your Matcap as a fallback when there's no reflections in the World.
Masking
Show on Outlines
- Type
- Toggle
If enabled, will make the Matcap effect appear on Outlines.
Mask
- Type
- Texture Slot
- Accepts
- Data texturesRGB Off
Mask that defines where to apply the Matcap effect. Black indicates where the matcap should not be applied, and white indicates where it should be applied.
Hide in Shadow
- Type
- Range
- Range
- 0to1
How much to hide the matcap effect in shadowed areas of the mesh.
Circle Mask
- Type
- Toggle
Enables the Circle Mask option for the Matcap, allowing the ability to have smaller matcaps without having them repeat.
Circle Mask Options
Global Mask
- Type
- Dropdown
- Options
- Off1R1G1B1A2R2G2B2A3R3G3B3A4R4G4B4A
Use a Global Mask to define where to apply the Matcap effect.
Blending
Replace
- Type
- Range
- Range
- 0to1
Replaces the base color with the matcap. At 1.0, the base color is completely replaced with the matcap. At 0.0, the base color is completely unaffected. Values in between will blend the base color with the matcap.
Multiply
- Type
- Range
- Range
- 0to1
Multiplies the base color with the matcap. This generally darkens the base color. Black areas of the matcap will always darken, white areas will not affect the base color, and colored areas will darken if the base color doesn't match the matcap color in that area.
Add
- Type
- Range
- Range
- 0to1
Adds the matcap to the base color. This generally brightens the base color. Black areas will be unaffected, while white areas will brighten. Colors are simply added on top of the base color.
Mixed
- Type
- Range
- Range
- 0to1
Mixes the Matcap to the base color. This generally changes certain areas of the base color by mixing colors together.
Screen
- Type
- Range
- Range
- 0to1
Blends the Matcap with the base color by looking at each channel's color information and multiplies the inverse of the blend and base color. This results in always a lighter color, although areas with black leaves the color unchanged and white will produce white.
This is in a similar way to how various Photo Editing programs does it, such as Photoshop.
Unlit Add
- Type
- Range
- Range
- 0to1
Same as Add, but instead blends an unlit/unshaded version of the Texture.
Custom Normal Map
- Type
- Toggle
Enables the ability to use a bump Normal Map with your Matcap.
Normal Map
- Type
- Texture Slot
- Accepts
- Normal mapsRGB Off
Normal map texture to apply when Custom Normal is enabled.
Intensity
- Type
- Range
- Range
- 0to10
How much to scale the normal map. This option is visible in the Normal Map dropdown.
Hue Shift
- Type
- Toggle
Enables hue shifting of the matcap texture.
Color Space
- Type
- Dropdown
- Options
- OKLabdefaultHSV
Choice of Color Space to use for the Hue Shift. By default, it will be set to OKLab.
Learn about the difference of Color Spaces as documented here in Color Adjust.
Select or Shift
- Type
- Dropdown
- Options
- Hue SelectHue Shiftdefault
This dropdown allows you to select how the Color Adjustment should behave when the Hue Shift is used. By default, this will be set to Hue Shift.
Select or Shift Options
Hue Select: Directly applies the selected Hue as an override to the entire Matcap.Hue Shift: Only tints the Matcap based on the lerped value. This is the default behavior.
Shift Speed
- Type
- Float
How much to constantly shift the hue with time. A value of 1 will result in a full hue shift cycle every 20 seconds.
Hue Shift
- Type
- Range
- Range
- 0to1
How much to shift the base color around the hue circle.
This value is circular, and will have the same result at 0 and 1.
Blur / Smoothness
Smoothness
- Type
- Range
- Range
- 0to1
How much to smooth the Matcap.
Apply Mask for Smoothness
- Type
- Toggle
Allows you to apply a Mask for your Smoothness value.
Mask Channel for Smoothness
- Type
- Dropdown
- Options
- RGBA
Which Channel to use for the Smoothness Mask.
Alpha Options
Override Alpha
- Type
- Range
- Range
- 0to1
How much to override the alpha channel of the base color. At 1.0, this will fully replace the base alpha with the matcap mask.
Intensity to Alpha
- Type
- Toggle
Enables a section that allows you to Blend the intensity of your Matcap to the Alpha.
Intensity to Alpha Options
Audio Link
- Type
- Toggle
- Shown when
Audio Link is enabled
Allows Audio Link to influence the Matcap.
The settings in this section will only be visible when Audio Link is activated on the Material.
Alpha Band
- Type
- Dropdown
- Options
- BassLow MidHigh MidTrebleVolume
Which band to use to change the Alpha modifier of this Matcap.
Alpha Mod
- Type
- Float2
How much to add to or subtract from the Alpha Modifier with Audio.
| Modifier | Function |
|---|---|
| Min | Amount changed to Alpha with No Audio in Size Band |
| Max | Amount changed to Alpha with Max Audio in Size Band |
Emission Band
- Type
- Dropdown
- Options
- BassLow MidHigh MidTrebleVolume
Which band to use to change the Emisison modifier of this Matcap.
Emission Mod
- Type
- Float2
How much to add to or subtract from the Matcap Emission with Audio.
| Modifier | Function |
|---|---|
| Min | Amount changed to Matcap Emission with No Audio in Size Band |
| Max | Amount changed to Matcap Emission with Max Audio in Size Band |
Intensity Band
- Type
- Dropdown
- Options
- BassLow MidHigh MidTrebleVolume
Which band to use to change the Intensity modifier with Audio.
Intensity Mod
- Type
- Float2
How much to add to or subtract from the Intensity with Audio.
| Modifier | Function |
|---|---|
| Min | Amount changed to Intensity with No Audio in Size Band |
| Max | Amount changed to Intensity with Max Audio in Size Band |